Camera Exposure Bracketing for Better HDR
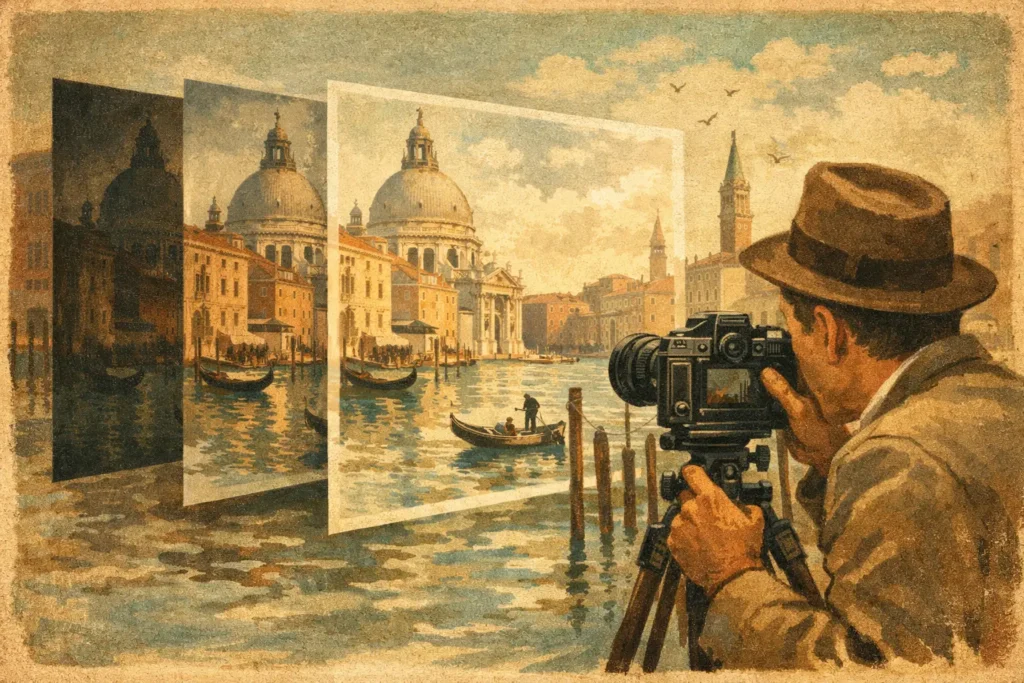
A bright window behind a carefully lit room can defeat a single exposure in seconds. Expose for the window and the room falls into heavy shadow. Expose for the room and the view outside turns into a white rectangle. Camera exposure bracketing gives you usable detail on both sides of that decision, so you can create one balanced HDR image instead of choosing what to lose.
For landscape, travel, architecture, and real-estate photographers, bracketing is less about making a stylized HDR effect. It is a practical way to record a scene whose brightness range exceeds what one frame can hold. The result can look completely natural: clear highlights, open shadows, and color that still resembles the place you photographed.
Why Camera Exposure Bracketing Works
Camera sensors have improved, but every sensor has a limit. In a high-contrast scene, the brightest portions may clip before the darkest areas have enough exposure to show meaningful detail. Once highlights are clipped, there is no texture left to recover. Raising deep shadows from a single underexposed frame can also reveal noise, color shifts, and reduced detail.
A bracketed sequence spreads the work across several exposures. The darker frame protects bright skies, windows, reflections, and light fixtures. The brighter frame records information in foreground shadows, interior corners, foliage, and dark materials. A middle exposure holds the scene near its normal tonal balance.
HDR merging combines the best-exposed information from each frame into a single file. This is why the sequence needs to be consistent: it is not three unrelated photos. It is one composition photographed at deliberately different exposure values.
A common three-frame bracket might be captured at -2 EV, 0 EV, and +2 EV. The negative exposure value frame is darker than the meter reading, while the positive frame is brighter. Five- and seven-frame brackets add more coverage when the contrast is extreme or when you want smaller exposure steps between frames.
More frames are not automatically better. A three-frame sequence is often enough for a cloudy landscape or a room with moderately bright windows. Five or seven frames can be worthwhile for sunlit architecture, dawn and sunset scenes, interiors with bright exterior views, or reflective surfaces. The trade-off is extra capture time and a higher chance that moving subjects will differ between frames.
How to Shoot Camera Exposure Bracketing
Most dedicated cameras offer auto exposure bracketing, often labeled AEB. Set the number of frames, choose the EV spacing, then hold the composition while the camera captures the sequence. Depending on the camera and shooting mode, it may adjust shutter speed, aperture, or ISO. For HDR work, changing shutter speed is generally preferable because it preserves depth of field and noise characteristics across the set.
Use aperture priority or manual exposure when possible. Choose the aperture for the depth of field you need, keep ISO low for maximum image quality, and let shutter speed change through the bracket. In manual mode, some cameras can still automate bracketing by shifting shutter speed. Check your camera behavior before a critical shoot.
Start with three frames and assess the scene
For a typical high-contrast scene, start with three frames at 2 EV intervals. Review the histogram rather than relying only on the image preview. You want at least one frame that retains highlight detail and one that provides enough shadow information without excessive noise.
If the brightest frame still leaves important dark areas nearly black, add frames or reduce the interval. If the darkest frame still clips a sunlit window or cloud texture, extend the sequence toward darker exposures. Bracketing should be based on what the scene requires, not a fixed habit.
Keep the camera as still as possible
A tripod remains useful for architecture, interiors, and carefully composed landscapes. It keeps framing consistent and allows longer shutter speeds at low ISO. But handheld bracketing is practical when your camera can fire a burst quickly and your shutter speeds remain high enough to prevent blur.
Alignment software can correct small shifts between frames. It cannot restore detail blurred by camera movement or subject motion. Brace the camera, use continuous shooting if available, and avoid recomposing until the complete bracket is captured.
Watch for movement inside the frame
Leaves, waves, people, cars, curtains, and water can change position between exposures. Without correction, an HDR merge may show ghosting: duplicated edges or semi-transparent moving objects.
This does not mean you should avoid bracketing whenever anything moves. It means you should capture quickly and use deghosting when merging. A lower deghosting setting may preserve subtle motion such as water texture. A stronger setting is often better for moving people, foliage in wind, or traffic visible through windows. The right choice depends on whether preserving detail or removing artifacts matters more in that specific image.
From Brackets to a Finished HDR Image
Capturing the frames is only half the workflow. The frustrating part often begins later, when a photo library contains hundreds of similar-looking images. You need to find the related exposures, confirm that they belong together, align them, handle movement, choose a tone-mapped look, and export a result that fits your editing and delivery process.
That is where EXIF data matters. Exposure settings, capture timing, and image metadata can identify a 3-, 5-, or 7-frame auto-exposure-bracketing set without relying on filenames or manual stacks. No manual sorting means fewer missed brackets and less time zooming through thumbnails to verify a sequence.
A practical HDR workflow has three stages: Detect, Merge, Export.
Detect: Group frames that belong to the same auto exposure bracket. Accurate detection matters when you return from a trip or a property shoot with dozens of sequences mixed into the library.
Merge: Align small handheld shifts, select deghosting based on subject movement, and combine the exposure data. The goal is clean highlight and shadow detail, not an obviously processed image.
Export: Choose the final tone mapping and save a full-resolution image or HEIC file that is ready for your library. A natural treatment is usually the best starting point for real estate, travel, and documentary-style photography. Vivid or dramatic processing can work well when the scene calls for stronger local contrast and color, but it should be a deliberate creative decision.
MergeHDR follows this workflow on Mac, iPhone, and iPad. It detects bracket sets from EXIF data, aligns frames automatically, offers four levels of deghosting, and processes images locally on your device. Nothing uploads. There is no account requirement, no remote server dependency, and no need to send sensitive interior, travel, or client photos outside your library.
Common Bracketing Mistakes That Waste Good Frames
The most common mistake is protecting shadows while ignoring highlights. A bright HDR result can still fail if windows, clouds, or reflections are clipped in every frame. Always make sure the darkest exposure contains the highlight detail you want to retain.
Another mistake is using a very long sequence for every scene. Seven frames can provide excellent coverage, but it also increases storage use, capture time, and motion risk. If a three-frame sequence already preserves the full tonal range, extra frames add overhead without improving the final image.
Changing focus between frames creates a more subtle problem. Keep focus locked once you have composed the shot. Likewise, avoid changing aperture during the bracket unless you specifically want a depth-of-field variation, which is not suitable for a standard HDR merge.
Finally, do not confuse HDR with overprocessing. Excessive local contrast, halos along rooflines, gray-looking skies, and unnaturally bright shadows can make a technically successful merge look artificial. Start with a natural tone map, then increase intensity only when the image benefits from it.
When a Single Exposure Is Better
Bracketing is not the answer to every scene. A fast-moving subject, such as a child running, a busy street, or wind-driven branches close to the lens, may be better served by one carefully exposed RAW frame. Modern RAW files can recover a useful amount of shadow detail when highlights are protected.
A single exposure also makes sense when the scene has modest contrast or when speed matters more than maximum dynamic range. The decision is practical: bracket when the scene contains detail you cannot hold in one frame, and skip it when motion or timing makes a sequence unreliable.
The best bracket is the smallest sequence that fully protects the scene. Capture it with steady framing, preserve the highlights, and let an efficient local workflow turn those exposures into a finished image while the moment is still easy to remember.
Let MergeHDR find your brackets.
MergeHDR detects exposure brackets in your photo library and merges them into HDR photos on-device — keeping every edit, album, favorite, and location. No account; free to try, with unlimited saves for $19.99 once or $9.99/year on iPhone, iPad, and Mac.