How to Fix Ghosting in HDR Photos Cleanly
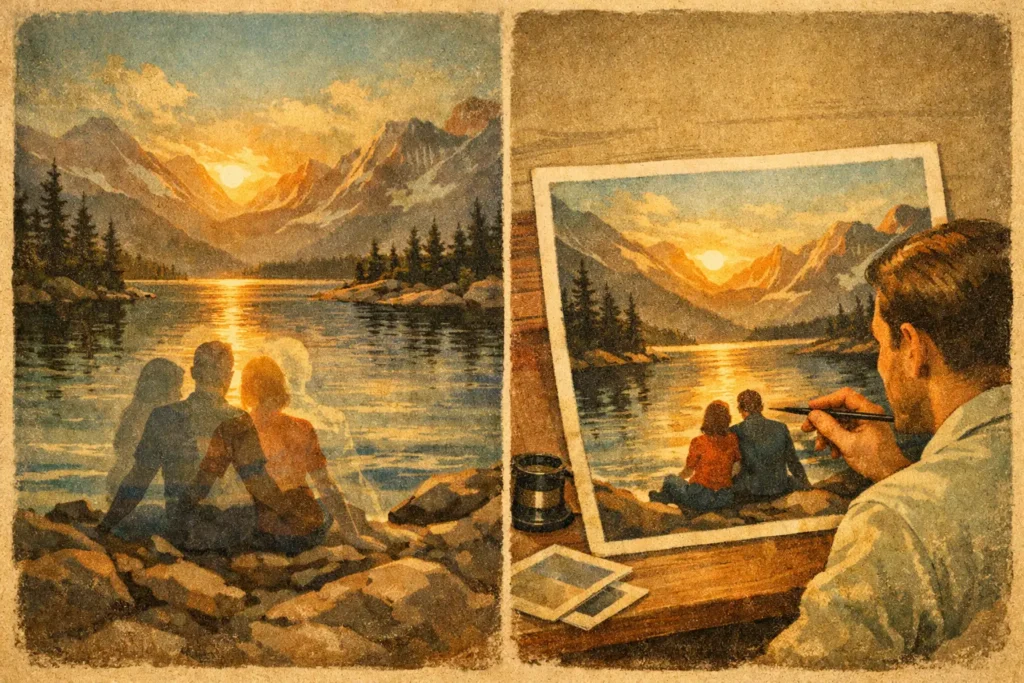
A three-frame bracket of a bright room can look perfect until the merge: the leaves outside the window double, a person becomes translucent, or a ceiling fan turns into a blur. To fix ghosting in HDR photos, you need to separate two different problems – camera movement between frames and subject movement within the scene – then use the right capture habits and deghosting level for each.
Ghosting is not proof that HDR failed. It is the predictable result of combining exposures captured at different moments. HDR merging is designed to recover highlight detail from darker frames and shadow detail from brighter frames. When pixels no longer describe the same object in the same position, the software must decide which exposure gets priority.
What Causes Ghosting in an HDR Merge?
A bracketed HDR set usually contains three, five, or seven images taken at different exposure values. Even when auto exposure bracketing fires quickly, each frame is a separate capture. Anything that changes position between those captures can create a mismatch.
Camera movement produces global misalignment. Handholding a camera, pressing the shutter, or shifting your stance can move the entire scene by a few pixels. This often appears as doubled rooflines, window frames, furniture edges, or distant horizons. Alignment corrects this type of movement by registering the frames to a common reference.
Subject movement is more local. Trees move in wind, water changes shape, cars advance, people walk through a room, and flags or curtains shift. Alignment cannot make a moving person occupy the same place in every frame. That is what deghosting is for: it identifies changing regions and selects a consistent source frame for those areas.
The difficult cases contain both problems. A handheld real-estate bracket may have slight camera shake while leaves outside the windows move in the wind. A clean result requires alignment first, then targeted deghosting.
How to Fix Ghosting in HDR Photos During Capture
The fastest correction happens before you merge. A stronger bracket gives the HDR processor more usable information and reduces the amount of reconstruction required later.
Use a tripod whenever the scene allows it, especially for architecture, interiors, dusk landscapes, and long focal lengths. A stable camera keeps straight lines and fine details consistent from frame to frame. If you are shooting handheld, brace yourself, use a faster shutter speed when possible, and trigger the bracket with minimal physical contact.
Keep the bracket short. Three exposures are often enough for scenes with moderate contrast, such as a shaded foreground beneath a bright sky. Move to five or seven frames only when the dynamic range truly demands it, such as a dark interior facing direct sunlight. More frames can recover more tonal information, but they also create more time for water, foliage, clouds, and people to move.
Watch the scene before pressing the shutter. For landscapes, wait for a pause in gusty wind. For water, decide whether motion is part of the look. For interiors, ask people to stay still or clear the frame. In real-estate work, a slightly open door or a spinning fan can be enough to create a visible artifact.
Exposure settings matter, too. Keep focus fixed across the set and avoid changing zoom or composition. On a camera workflow, aperture-priority bracketing is often preferred for consistent depth of field. If the camera changes aperture between exposures, focus falloff and diffraction can vary from frame to frame, making edges harder to merge naturally.
Use Alignment Before Increasing Deghosting
When you review a problematic merge, start by identifying whether the artifact occurs across the whole image or only in specific moving areas.
If building edges, window frames, cabinets, or the horizon show double contours, enable automatic alignment. This is the right tool for handheld brackets and minor camera movement. It adjusts each exposure so stable features line up before the tonal merge begins. Alignment is particularly valuable when shooting travel scenes quickly, where carrying a tripod is not practical.
If the ghosting is confined to trees, people, waves, cars, or other moving subjects, increase deghosting instead. Deghosting compares the bracketed frames, detects areas that changed, and preserves one version of that area rather than blending several positions together.
Do not assume the strongest setting is always best. Aggressive deghosting can protect a moving subject, but it may also create an abrupt transition around fine details such as hair, branches, railings, or rippling water. Start at a lower setting, inspect the affected region at full size, and increase only as far as the scene requires.
This is a practical trade-off. A quiet interior with one person walking through it may need a higher level. A landscape with a few softly moving leaves may look more natural with moderate deghosting, even if a small amount of motion remains.
Choose a Reference Frame That Makes Sense
Every deghosting process needs a consistent frame to represent the moving area. In many HDR workflows, the middle exposure is a sensible reference because it usually contains balanced midtone detail. But the best source depends on the subject.
For a person in a bright doorway, the darker exposure may preserve more detail in the highlights behind them. For movement in deep shade, a brighter exposure may show a cleaner subject. For water and foliage, the goal may not be to freeze every detail but to avoid obvious repeated edges and patchy tonal changes.
Look for these warning signs after merging: halos around moving objects, a subject with different brightness than its surroundings, repeated edges, or a sharply defined patch inside otherwise soft motion. If you see them, test a different deghosting level or reference choice rather than pushing contrast or clarity to hide the problem. Local mismatch is a merge decision, not a tone-mapping problem.
Tone Mapping Can Make Ghosting More Visible
Tone mapping does not cause ghosting, but it can expose it. A dramatic treatment raises local contrast and pulls detail from shadows and highlights, which can make doubled edges, halos, and mismatched movement stand out. A natural treatment often handles scenes with subtle movement more gracefully because it keeps local contrast under tighter control.
That does not mean dramatic HDR is wrong. It simply requires a cleaner source set. If your bracket includes wind-blown foliage or active water, begin with a natural result and evaluate the merge before choosing a more vivid or dramatic look. The order matters: first confirm that the pixels are cleanly combined, then decide how much visual punch the final image needs.
For interiors, keep an eye on window edges, blinds, hanging lights, and fine furniture details. For landscapes, inspect branches against bright skies, wave crests, moving clouds, and grasses near the foreground. These high-contrast boundaries reveal residual ghosting faster than broad areas of tone.
A Faster Apple Workflow for Ghost-Free HDR
Manual sorting creates unnecessary opportunities for error. Selecting the wrong frame, missing part of a bracket, or merging exposures from two near-identical compositions can look like a deghosting failure even when the software is working correctly.
MergeHDR reduces that overhead with a simple Detect, Merge, Export workflow. It identifies 3-, 5-, and 7-frame auto-exposure-bracketing sets from EXIF data, so there is no manual sorting and no wasted brackets. Automatic frame alignment handles small camera shifts, while four deghosting levels give you control when subjects moved between exposures.
The workflow stays on your device. Nothing uploads, and your photos are not sent to a remote server for processing. That matters for client interiors, property photography, travel work, and any library you prefer to keep private. Once the merge is clean, choose a natural, vivid, or dramatic tone map and export at full resolution or as HEIC, ready for your library in seconds.
When a Single Exposure Is the Better Choice
Some scenes move too much for a convincing HDR merge. A crowded street, fast waves, heavy wind through trees, or a busy event can change dramatically during even a fast bracket. In those cases, a single well-exposed RAW image may produce a more believable result than forcing an HDR merge.
This is especially true when the moving subject is the main subject. A cyclist crossing a sunlit street or a child running through an interior should usually be captured in one exposure, with highlights protected as much as possible. HDR works best when the scene’s structure remains stable and the brightness range exceeds what one exposure can hold.
A clean HDR image is less about eliminating every trace of movement than making deliberate choices. Stabilize the camera, keep brackets efficient, align global movement, deghost local movement, and inspect the high-contrast edges before export. When the scene is too active, trust the single frame. When it is stable enough to merge, your HDR should look like one photograph, not several exposures competing for attention.
Let MergeHDR find your brackets.
MergeHDR detects exposure brackets in your photo library and merges them into HDR photos on-device — keeping every edit, album, favorite, and location. No account; free to try, with unlimited saves for $19.99 once or $9.99/year on iPhone, iPad, and Mac.