Tutorial
How to merge bracketed photos on Mac
You've shot an exposure bracket — three, five or seven frames of the same scene at different exposures — and now you need one finished image out of it. Here are the three main paths on macOS, from fully manual to fully automatic, so you can pick the one that fits how you work.
Option 1: Lightroom Classic
If your library already lives in Lightroom Classic, its built-in Photo Merge is the most direct manual route:
- Select the set In the Library module, select the bracketed frames you want to merge — usually 3, 5 or 7 images shot seconds apart.
- Open Photo Merge Photo → Photo Merge → HDR (or press Command-H) to open the HDR merge preview dialog.
- Align, deghost and merge Enable Auto Align, choose a deghost amount if anything in the frame moved, then click Merge to produce a new 32-bit HDR DNG in your catalog.
It produces solid, reliable results — the trade-off is that you find and select every bracket set yourself, one at a time, which gets tedious fast across a big shoot with dozens of sets buried in thousands of frames. The resulting 32-bit DNG is also large, and Lightroom Classic itself is a subscription product.
Option 2: Free tools
Two well-regarded free, open-source tools cover this without a subscription. HDRMerge takes your bracketed RAW files and produces a single extended-range DNG, aiming to preserve as much of the original sensor data as possible rather than baking in a tone-mapped look — you still tone-map afterward in your RAW editor of choice. Hugin, better known for panorama stitching, bundles enfuse, which does natural exposure fusion — blending the best-exposed parts of each frame directly into a finished image without an intermediate HDR file.
Both are capable and genuinely free, but the workflow is more manual and more technical than a purpose-built merge app: you launch a separate program, load the files by hand, and work through settings with less guidance than a photo-editor plugin gives you. Worth it if you enjoy the control and don't mind the extra steps; a lot of people would rather skip straight to something that finds the sets and merges them without any of that.
Option 3: The automatic way — MergeHDR
MergeHDR removes the finding-and-selecting step entirely. Install it on your Mac and it works directly against your Photos library:
-
Open MergeHDR
MergeHDR scans your Photos library in the background and lists every detected bracket set it finds, grouped and ready to review — no manual searching through your library required.
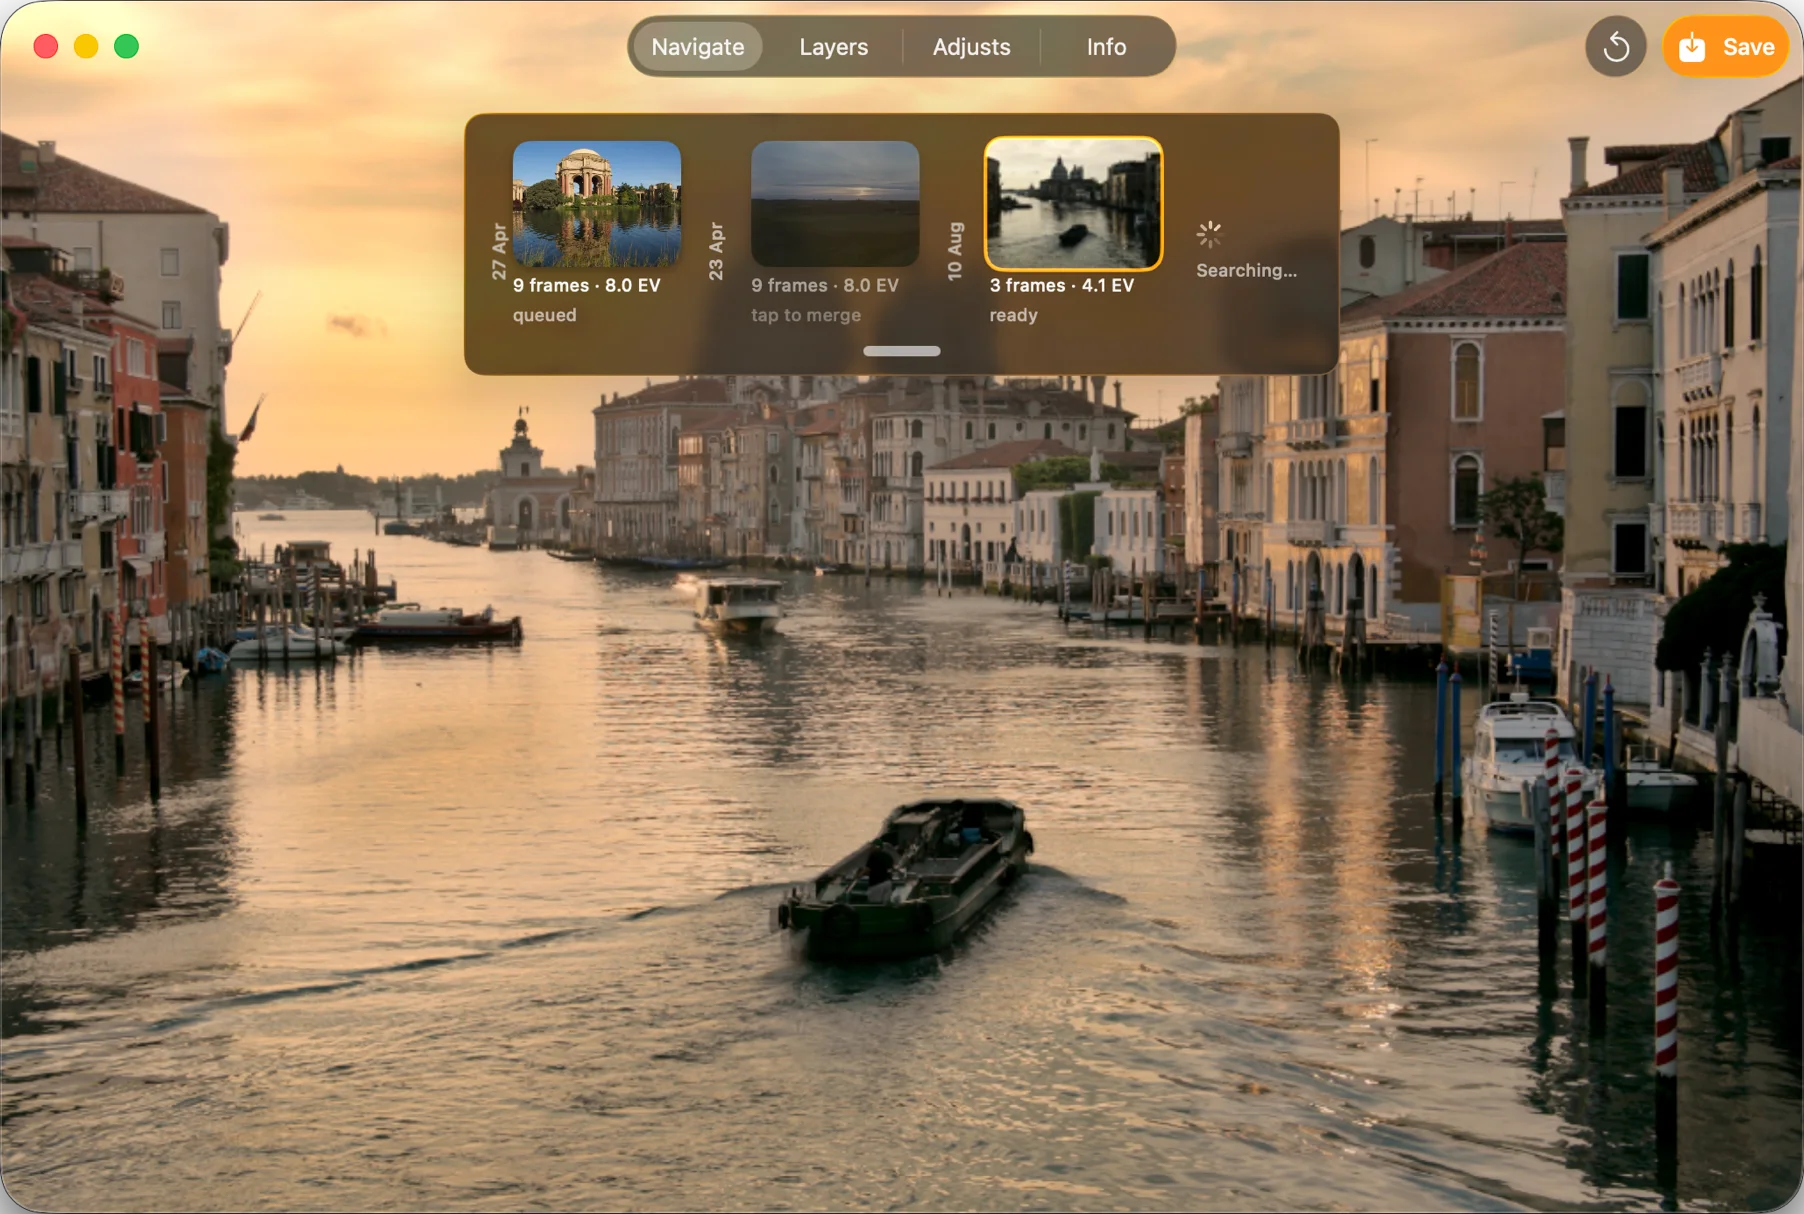
Step 1 — MergeHDR lists every bracket set it finds in your library. -
Pick a set and choose your options
Select a set, then choose alignment on or off, a deghosting level for anything that moved between frames, and a tone-mapping style — natural through punchy — before merging on-device.
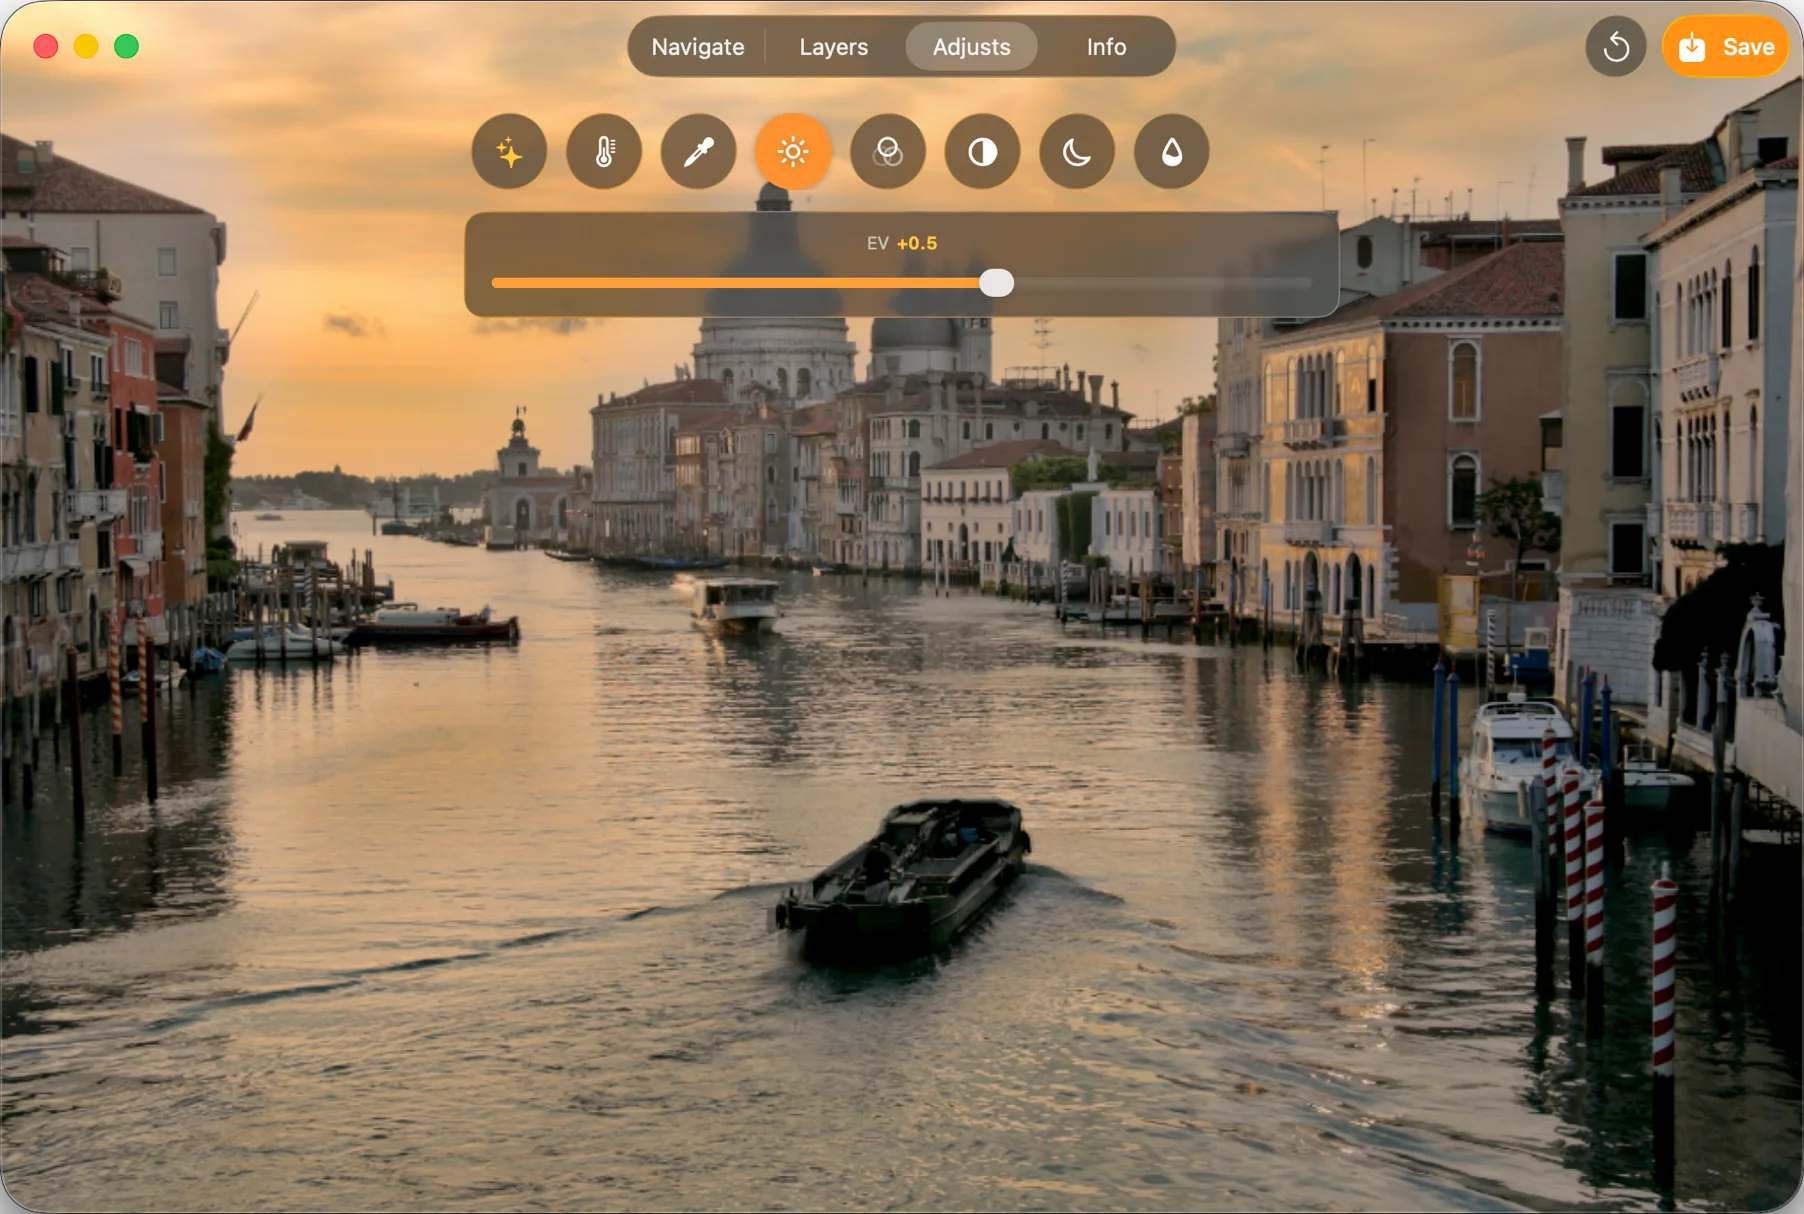
Step 2 — shape the result: exposure, temperature, contrast and more. -
Export
Export the merged result at full quality, or compress it straight to HEIC in the same step, using the same on-device pipeline as our other app, RAWtoHEIC (opens in a new tab).
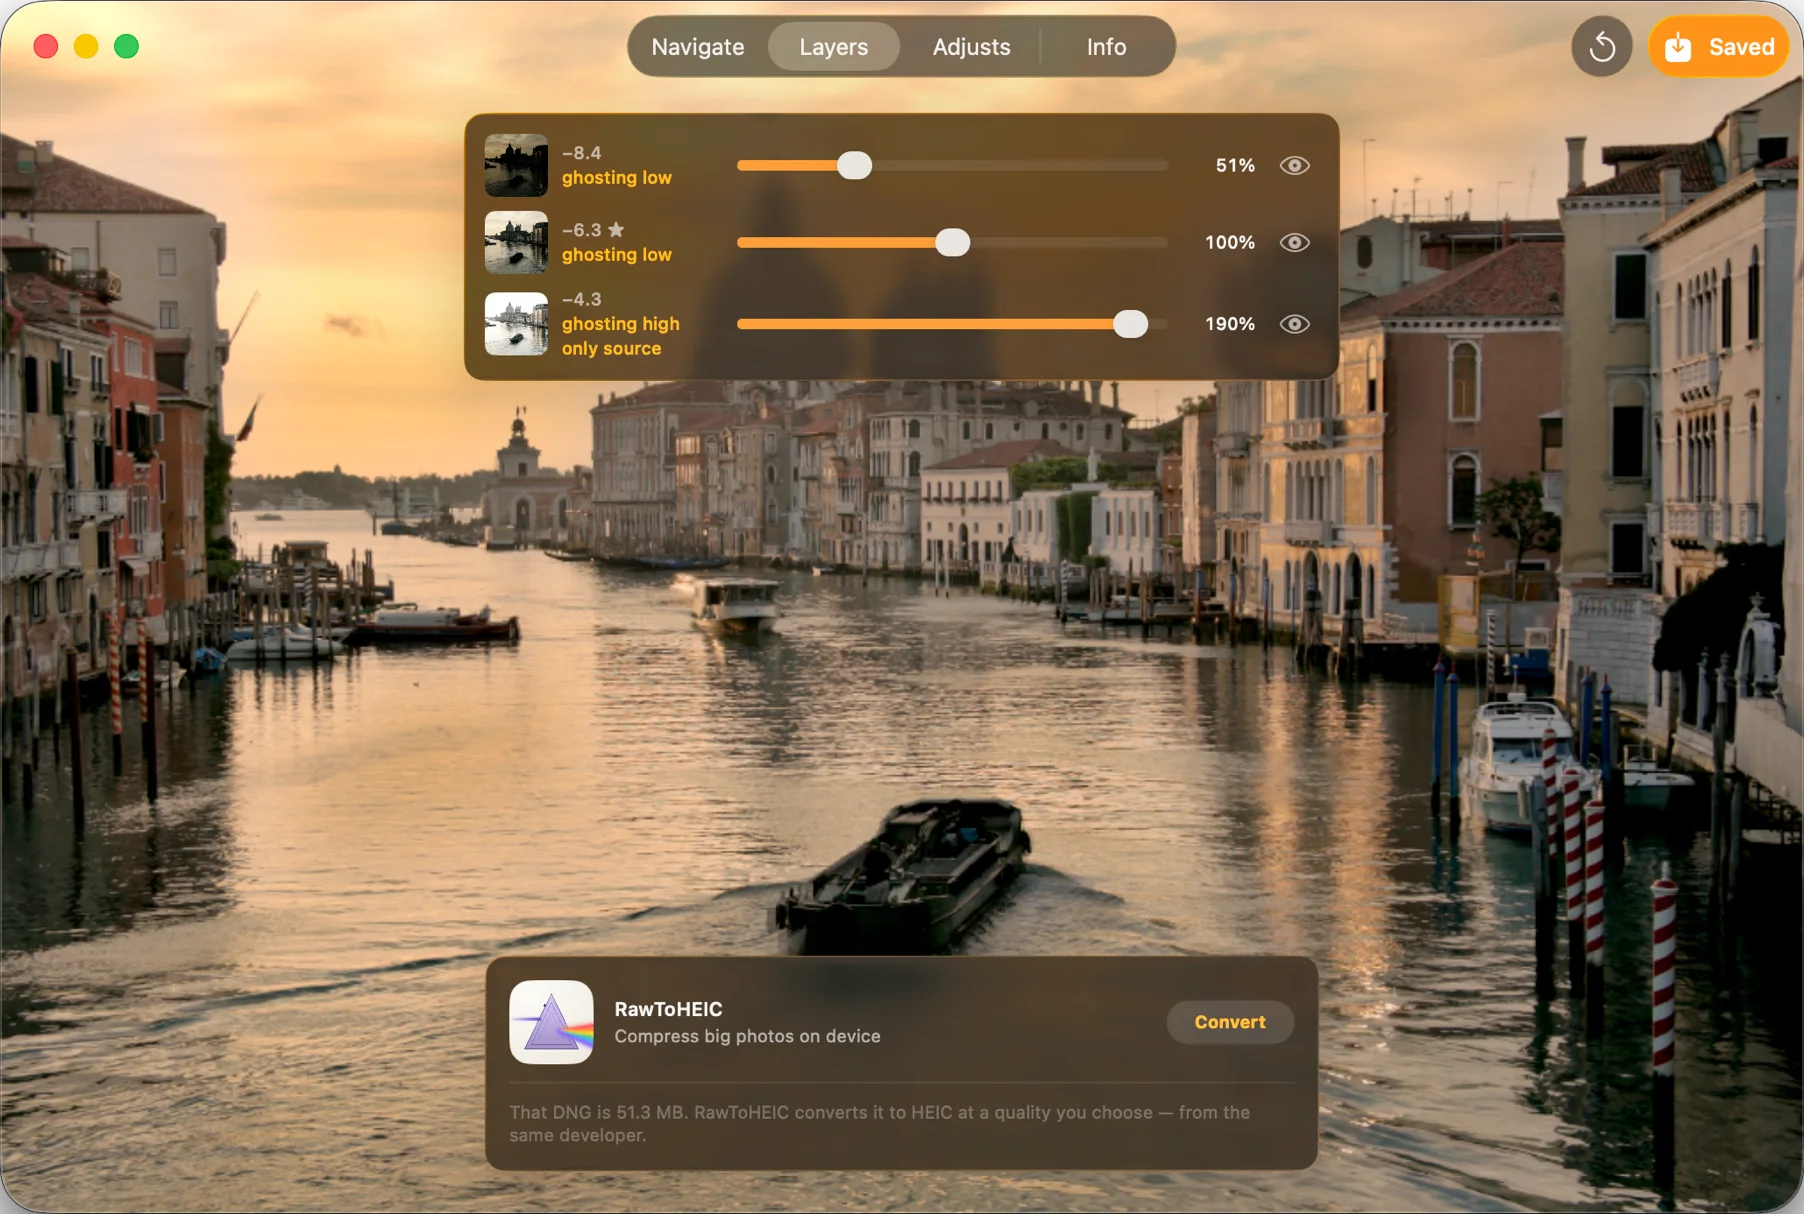
Step 3 — saved at full quality, with RAWtoHEIC offering to compress it to HEIC.
Let MergeHDR find your brackets.
MergeHDR watches your photo library, detects your exposure brackets automatically, and offers the merge — on-device, no uploads.


