HEIC Export Guide for HDR Photos on Apple
A window-lit interior is where export decisions become visible. The sky outside needs controlled highlights, the room needs usable shadow detail, and the finished image needs to look right in Photos without creating an oversized file. This HEIC export guide covers the choices that matter after an HDR merge: resolution, color, compatibility, metadata, and the checks that prevent a good merge from becoming a disappointing final image.
Why HEIC is a practical HDR export format
HEIC is not simply a smaller replacement for JPEG. On Apple devices, it is a modern, efficient format that can preserve strong image quality at a substantially smaller file size than an equivalent JPEG. That matters when a landscape bracket, real-estate set, or travel shoot produces dozens of finished HDR images that all need to live in the same photo library.
For a tone-mapped HDR image, HEIC is often the sensible delivery format. It is easy to browse on iPhone, iPad, and Mac, shares well within Apple workflows, and keeps storage from growing as quickly as it would with high-quality JPEG exports. A smaller file also makes it easier to keep completed images alongside the original bracket frames rather than exporting only a few selected shots.
The trade-off is compatibility. Most current Apple software handles HEIC well, but older computers, certain listing portals, some client systems, and a few web services may still expect JPEG. HEIC is a strong library and Apple-device format. It is not automatically the right handoff format for every destination.
HEIC export guide: start with the finished use
Choose export settings based on where the image will go next, not just on the camera that captured it. A full-resolution HEIC makes sense when the photo will remain in your Apple Photos library, be edited again later, or be delivered to someone using current Apple hardware. It preserves flexibility without making every export unnecessarily large.
For email previews, messaging, or a website upload with strict size limits, a reduced-size copy may be more appropriate. Keep the full-resolution master in your library and create a smaller derivative only when you need it. Repeatedly downsizing and re-exporting from an already compressed file can soften fine detail in foliage, masonry, water, and architectural lines.
A practical decision looks like this: retain the finished, full-resolution HEIC as your primary export; make JPEG copies only for systems that require JPEG; and resize only for a defined delivery limit. That approach keeps one dependable master while avoiding wasted storage from multiple oversized versions.
Preserve the pixels you worked to recover
HDR processing exists to retain detail that a single exposure cannot hold. In a bracketed sunset, that may mean color in bright clouds and texture in a dark foreground. In an interior, it may mean seeing through windows while preserving natural room tones. Exporting at the source resolution gives those recovered details their best chance of surviving crop, zoom, print, and later edits.
Do not confuse full resolution with a guarantee of better results. If the source frames are soft from motion, out of focus, or heavily noisy in the darkest exposure, a large export will faithfully retain those limitations. Alignment, deghosting, and sensible tone mapping should happen before export. Resolution protects the final result. It cannot repair a flawed merge.
Check color before you save a batch
Color is one of the most overlooked parts of HEIC export. Apple displays wide-color images well when the photo, app, and display support the same color handling, but appearance can change when an image moves to a browser, older display, or third-party service.
Before exporting an entire shoot, inspect one finished image in the environment that matters. Look at blue skies, saturated signage, warm interior lights, and neutral walls. These areas reveal color shifts quickly. If the destination is an Apple library or current Apple device, HEIC is usually a natural fit. If the image is headed to a service with unpredictable color handling, test a sample there and use its specified format and color requirements.
Avoid pushing saturation simply because an HDR preview looks flat at first glance. A vivid tone map can be effective for a dramatic landscape, but it can make grass, painted walls, and skin tones look artificial after export. Natural tone mapping is usually the safer starting point for real estate, architecture, and documentary travel work. Increase intensity only when it supports the scene rather than calling attention to the processing.
Keep metadata when it helps your workflow
Capture date, location, camera information, and lens data make a finished image easier to find later. They also help maintain a useful record when you compare results from different cameras or revisit a property shoot months afterward. If your export workflow offers metadata retention, leave it enabled unless you have a specific privacy or delivery reason to remove it.
Location data deserves a separate decision. It can be useful for personal travel archives, but it may not belong in files sent publicly or shared with clients. Export settings should support the job, not apply the same sharing assumptions to every image.
Detect, merge, export without manual sorting
A reliable HDR workflow begins before the export panel. The bracket frames need to be identified as a set, aligned when the camera moved slightly, and deghosted when leaves, water, people, or vehicles changed between exposures. If these steps are inconsistent, changing HEIC quality or file size will not solve the visible problem.
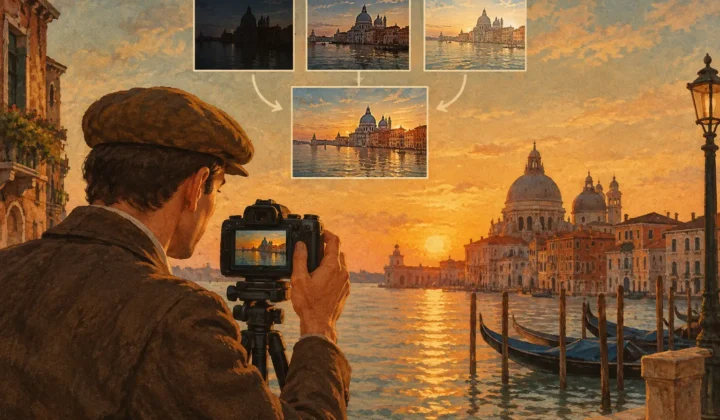
MergeHDR follows a direct Detect, Merge, Export workflow. It reads EXIF data to identify 3-, 5-, and 7-frame auto-exposure-bracketing sets, so you do not have to hunt through a library and manually group similar exposures. After alignment and your choice of deghosting and tone mapping, the finished photo can be exported at full resolution as HEIC, ready for your library in seconds. Processing stays on your device. Nothing uploads, and no account is required to process your photos.
For handheld brackets, inspect edges near windows, rooflines, railings, and tree branches before exporting. These are the areas where small shifts can become obvious. For moving subjects, use the level of deghosting that removes distracting duplicates without erasing legitimate fine detail. It depends on the scene: wind-blown foliage may need more correction than a still building, while an aggressively deghosted scene can lose subtle texture.
Four HEIC export mistakes that cost image quality
The first mistake is exporting before reviewing at full size. A thumbnail can hide double edges, haloing around bright windows, and strange detail in moving water. Zoom in before committing a batch.
The second is treating every HDR scene the same. A dramatic setting can flatter storm clouds and mountain light, yet look excessive in a bright kitchen or hotel lobby. Match the tone map to the subject and intended use.
The third is overwriting your only finished version with a smaller share copy. Keep the full-resolution HEIC in your library, then create lighter versions when a recipient or platform needs them.
The fourth is assuming HEIC will be accepted everywhere. It works exceptionally well across current Apple workflows, but delivery requirements still win. If a client, MLS platform, print lab, or upload form specifies JPEG, export a JPEG copy for that destination rather than asking the recipient to convert it.
Build an export habit that saves time later
A short review routine prevents most avoidable export problems. Confirm that highlights retain detail, shadows are open without looking gray, moving elements are clean, and vertical lines remain aligned. Then save the full-resolution HEIC to your library with the metadata you want to retain.
That final check takes less time than reprocessing an entire bracket set after the fact. A good HEIC export should feel uneventful: the brackets are already organized, the merge is clean, the file is the right size, and the image is ready when you need it.
Let MergeHDR find your brackets.
MergeHDR detects exposure brackets in your photo library and merges them into HDR photos on-device — keeping every edit, album, favorite, and location. No account; free to try, with unlimited saves for $19.99 once or $9.99/year on iPhone, iPad, and Mac.